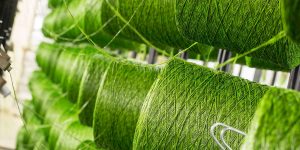
A complete installation guide from start to finish showing exactly how to install artificial grass. From turf cutting, to leveling and sand infill this guide shows you all the required steps for creating a wonderful artificial lawn.
1. Before you begin laying the astroturf, measure the area when quoting for the job. Gridding the area in roll sizes of 2m or 4m widths. Rolls are made to a standard size of 4x25m, so you will need to consider wastage factors. Grass should always be installed in the same direction.
2. When the install date arrives, remove turf with a sharp spade or preferably a mechanical turf cutter.
3. Using a sharp spade, create a chamfered finish at perimeters. Set at approximately 30-35mm below perimeter edgings.
4. Using a rake, level the area off to natural falls, as you don’t want humps or bumps before installing the stone base. Where there is no edge to butt into, install our edging product.
5. Install a liberal layer of 6mm to dust granite stone or similar. Using a rake, level the area out creating a crowned profile to produce a natural appearance to the installation. Note: On soft/un-stable ground, a type-1 stone base will be required before installing the fine granite stone.
6. Set and finish perimeter heights at approx. 15mm below the edge system.
7. Now wet down the area and compact.
8. Once complete, install the weed membrane. This should be stretched out and fixed using 4″ nails around the perimeters and then trimmed.
9. Unroll the grass and position ideally running the pile towards the house on back gardens and the reverse on front lawns (i.e. facing out).
10. When laying the artificial grass, ensure it fits up to the outer perimeters. Where there is an obstacle (like a tree or post), fold the grass back and decide the shortest route to cut. Then cut between the tufts. Take care not to trim any of the blades of grass as this will create a poor seam.
11. Where the grass fits too tight around the obstacle, splice the carpet starting at the bottom of the obstacle. This releases any tension and allows the grass to lay flat. The two edges that have been cut to go around the post should come together. If not, this indicates that the grass is still under tension and will need further cutting.
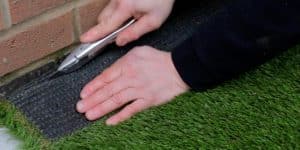
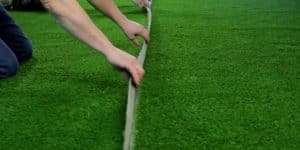
12. To join sections of grass, lay the joining tape blotting side up (shiny side down). Nail this in place.
13. Before you continue fitting the artificial grass, check the alignment and then trim at the perimeter edge near the joint. This will ensure the joint is not disturbed once the artificial grass adhesive has been applied.
14. Using a mastic gun, apply a bead of adhesive just under the edge of the grass followed by another bead to the front edge grass. Carefully bring the second piece together taking care not to bury the tufts. Lightly pressurize the seam to disperse the adhesive.
15. Using 4″ galvanised nails, nail up the seam at leading edges and stager down the seam. Open the pile up to ensure the nails do not bury any tufts.
16. Trim perimeter edges and nail at corners and approximately every 0.75m.
17. Where the pile runs away from the perimeter edges, Kink the carpet and brush the pile with hand to encourage the pile to run into the edge.
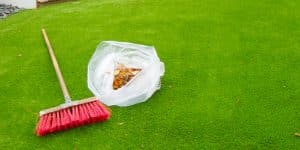
18. Finally, once you have completed laying the artificial grass and it has been seamed and nailed, install a heavy layer of Kiln Dried Sand into the perimeters. Ensure you claw the pile open to ensure the perimeter edges are completely loaded with sand. When you do not have the use of a hopper of mechanical brush and blower, cut holes in the bags of sand and apply evenly.
19. Apply 6-8kgs per sqm. Using a stiff yard brush, brush the sand in to the pile, always brushing the pile open.